In episode 3 you’ll build a user model and controller, set-up the signup page, and get a ‘first-look’ at sails blueprints.
Building a Sails Application: Ep2a - Stuff I Forgot to Mention in Episode two…because I’m Old.
In this quickie I added jquery, showed ya how to load jquery.js before bootstrap.js by changing Gruntfile.js, minor changes to layout.ejs and added a custom.less file to styles.
Building a Sails Application: Ep2 - Creating a Sign-up Page, ‘First-look’ at Routes, and Adding Twitter Bootstrap.
Transcript
Okay, welcome back. Now we’re going to go through and look at the layout of our application. So first of all, let’s go ahead and start the server, sails lift. And you’ll see the default route, launches this sails welcome page, which was generated when we created the new project. So let’s take a look at this file. First I want to go into config/routes.js. So this is where the routing is taking place for the root route to /home/index. And if we look at the /views directory under /home we can find that index.ejs file being rendered here in this default page. But we want to change that.
So we’ll go back in the project and we’re going to go look in our /views folder and actually create a new folder in this case static. This is what is going to hold our static pages. And then within the /static folder, I’m going to create a new file and this file is going to be called index.ejs. And then let’s just put a header in here that says, <h1>This is our home page.</h1> Alright.
Then we’re going to go into the routes.js file and change this default root route and instead of home/index we’re going to rename that static/index. Let’s restart the server. And now when I refresh the page, we’re on our new home page.
Let’s look a little deeper into this file, I’m going to go ahead and look at the source and there’s a bunch going on. What’s going on really derives from a file called layout.ejs, so let’s look at that in our project. So layout.ejs is going to be the wrapper of content that’s not going to change from page to page. Whereas your views are going to be the dynamic content that will change. So in this case our static index page, this h1 that says this is our home page is the view, dynamic view, that’s inserted here where it says body into our layout and sails is going to wrap the layout.ejs file around our index.ejs file.
One other thing to note is the linker designation. If you look under assets/linker, what that’s going to do is as a convenience, all the javascript that you put under /js, the styles that you put under /styles will be compiled and minified via this layout.ejs file when sails’ lifts. So this is a way we can use twitter bootstrap and we can drop our twitter bootstrap javascript files and css files right into here and they’ll be available on every page via the layout.ejs file and I’m going to show you how that works right now.
So through the magic of editing, I’ve dropped bootstrap.js and bootstrap.css right into our project and let’s see what changes were made here. If we go back to our file and reload that page you can see that some of the styling form bootstrap is already taking effect.
If we go back to layout.ejs you’ll also notice that our css and javascript have been inserted into the layout.ejs file. How that’s done is using grunt and I’m going to have a separate screencast that will go over how to customize this grunt file.
The last thing we need to do is customize our index.ejs file for our sign-up page and let’s do that now. So through the magic of cut and paste I’m going to put some new code here and save it and then go see what it looks like.
After I refresh the browser that’s much better. I also want to add some navigation. But here the navigation isn’t going to change from page to page, so that would be better put in my layout.ejs file. So let’s go place it there.
So above this <%- body %> I’m going to place our nav code. And below the body I’m going to put our footer code. I’m going to save this and let’s go back to the browser and referesh. We now have our basic nav bar, footer, and at least link to the sign-up page.
Alright, in the next screencast we’re going to go over creating our first model and controller and hooking that up to the sign-up page. Thanks for watching.
Building a Sails Application: Ep1 - Installing Sails and Create Initial Project
This is a part of a series of screencasts which build a sails application from scratch. Episode 1 goes over installing sails and creating the initial sails project.
activityOverlord Episode 1
Websites referenced
The Transcript
So I’m going to assume that you have node up and running. So the first thing we’re going to do is install sails. To do that we’re going to use npm, the node package manager that comes with node itself. It’s really easy to use if you want some references, you can go to the sailsjs.com website, getting started or you can go to npmjs.org, what we’re going to do is go straight to the terminal and type npm install sails -g:
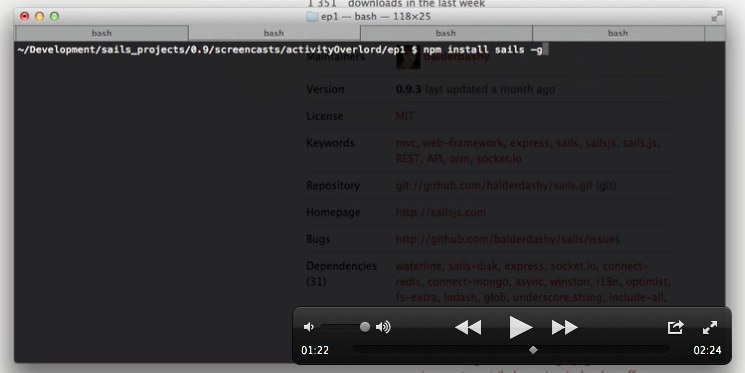
which stands for global, the dash g stand for global and what that does it installs sails globally and allows us access to some functionality like sails new which we’re going to use in a second to create the initial project.
So go ahead and install sails and we get back we’ll start creating this new project. One thing to note if you have an issue, you might need to use sudo, you might need to have administrator or super access to install sails globally, so you might want to use sudo npm install sails -g, see you in a second.
Okay, now that you have sails installed let’s create this project. To do that we’re just going to type sails new activityOverlord —linker.
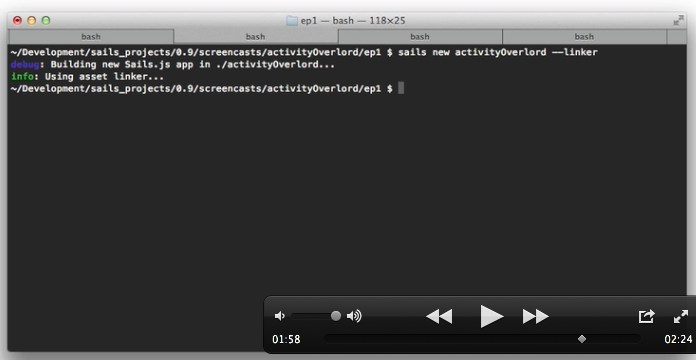
The linker designation utilizes some new functionality starting with .9 of sails dealing with assets and grunt. I’m going to have separate screencasts that will go into detail about that functionality but for now just go ahead and use the dash dash linker. And that’s it. we have our application.
So change directory (cd) into the new directory and let’s just make sure it’s running, so type sails lift to start the sails server. We’re going to be running on localhost port 1337 (localhost:1337) and it’s running just fine.
In the next screencasts were going to be connecting this application to the mongodb database.
Thanks for watching.
What the Heck Is activityOverlord and Why Should I Care?
activityOverlord is a project I’m building to learn sails.js. The application currently has authentication, rights management, real-time presence, activity logging, and much more. This video is a brief look at the partially completed app.
The Transcript
Howdy and welcome to activityOverlord.
What the heck is activityOverlord.
It’s an example application that I’m building to try and learn sails.js and I thank everybody over at Balderdash Mike, Zoli, Cody and everybody that’s helped me figure out this application along the way.
I was going to have it fully fleshed out and then provide these screencasts all laid out and then I decided in the spirit of minimally viable development, instead I was going to get something out which has a fair built of functionality already, which I’ll show you in just a second and then produce screencasts as I go.
So, let’s take a look at the application. It’s using twitter bootstrap as far as styling and I’ll show you how to set-up all the assets to do that. We’re using a mongodb back-end database, I’m gonna show you how to do that, how to deploy this application.
Let’s go ahead and sign-in, so we’ve got user authentication, rights and policy management, you can tell that I’m an admin, so it’s giving me rights to the list of users as well as activities, pagination, a lot of different things that are going on.
Let’s look at the real-time side of things. I’m going to bring up another chrome instance. I’m going to log in as a different user so now it gave me a flash message, it updated my status as far as presence for this particular page in real-time, I can do things like delete Aimee Mann here and you can see that that’s been updated in my list here, there’s a ton of things to go over, I can’t wait to get started, I’ll see you in the next screencast which will start with really getting sails.js up and running.
See ya there.