This is a part of a series of screencasts which build a sails application from scratch. Episode 1 goes over installing sails and creating the initial sails project.
activityOverlord Episode 1
Websites referenced
The Transcript
So I’m going to assume that you have node up and running. So the first thing we’re going to do is install sails. To do that we’re going to use npm, the node package manager that comes with node itself. It’s really easy to use if you want some references, you can go to the sailsjs.com website, getting started or you can go to npmjs.org, what we’re going to do is go straight to the terminal and type npm install sails -g:
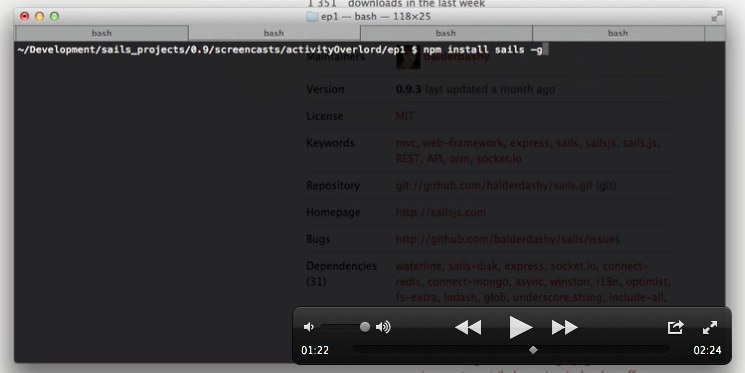
which stands for global, the dash g stand for global and what that does it installs sails globally and allows us access to some functionality like sails new which we’re going to use in a second to create the initial project.
So go ahead and install sails and we get back we’ll start creating this new project. One thing to note if you have an issue, you might need to use sudo, you might need to have administrator or super access to install sails globally, so you might want to use sudo npm install sails -g, see you in a second.
Okay, now that you have sails installed let’s create this project. To do that we’re just going to type sails new activityOverlord —linker.
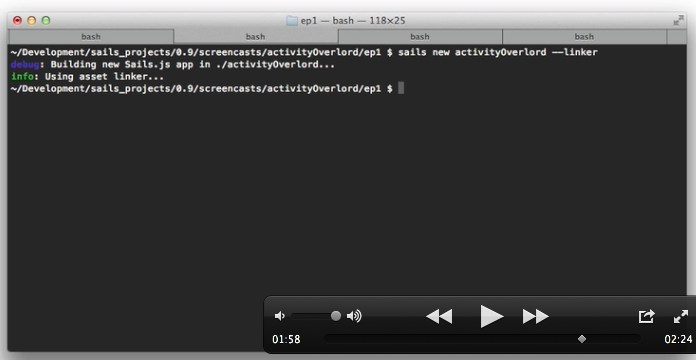
The linker designation utilizes some new functionality starting with .9 of sails dealing with assets and grunt. I’m going to have separate screencasts that will go into detail about that functionality but for now just go ahead and use the dash dash linker. And that’s it. we have our application.
So change directory (cd) into the new directory and let’s just make sure it’s running, so type sails lift to start the sails server. We’re going to be running on localhost port 1337 (localhost:1337) and it’s running just fine.
In the next screencasts were going to be connecting this application to the mongodb database.
Thanks for watching.