So I’ve seen a bunch of questions asking where should you put your assets in your sail’s project. In this episode I’m going to talk specficially about javascript and css assets.
So, Sails uses grunt to manage assets. And Grunt generically provides ways for you to automate repeititve tasks. Sails uses grunt for tasks like syncing files between a project folder structure and the server’s public folder, but as always, I’m getting ahead of myself.
The configuration of grunt is based upon a file called Gruntfile.js found in the root of your sails project. There’s a lot going on in this file, however, again I’m going to concentrate on the javascript and css assets.
Your Project’s Assets
When you first create a project, you have the option of using the --linker flag. I’m going to actually create two projects, one with the linker flag and one without. Let’s compare the two. Both have an /assets folder. But the project with linker, not surprisingly has a /linker folder and that’s within the /assets folder. In the linker example, an additional /templates folder is also created.
USING the --linker flag
123456
/assets
  /images
  /linker
    /js
    /styles
    /templates
NOT USING the --linker flag
1234
/assets
  /images
  /js
  /styles
The Server’s Public Folder
Okay, great we have a /linker folder, but so what? Well, let’s add some javascript and css to both projects and see what happens. I’ve replaced the index.ejs file in the `/views/home’ folder of both projects with some very basic mark-up.
123
<h1>Custom View</h1><divclass="custom"></div>
Next, I added jquery to the /js folder of both projects. I also added my own javascript file — custom.js to the /js/ folder.
1234
$(document).ready(function(){$('.custom').append("<h1>Yes Irl, javascript is here and if I'm red css is working as well.</h1>");$('.custom').addClass('working');});
Finally I added custom.css in the /styles folder:
123
.working{color:red;}
If the javascript and css are being linked properly, this is what our page should look like.
The custom.js file appends some html to the div in the index.js file. Then it will add a new class working to the div which will trigger the css located in the custom.css file.
Let’s take a look at the project where we used the --linker flag first. I’ll start sails using sails lift. The first thing you’ll notice is that a hidden .tmp folder is created. This is the server’s public folder. Opening up this folder reveals files that have been sync’d with the /assets folder. So we can see that jquery.js, custom.js, and custom.css files have all been copied into the public folder. Next, I’ll open up a browser and enter localhost:1337. Our heading showed up, but something’s up with my javascript because the appended html isn’t showing up. Let’s take a look at the console. Okay, there’s our problem. Jquery isn’t being loaded. Let’s take a look at the page’s source. Jquery is there, however, it’s being loaded in the wrong order. You might be asking yourself, how, did those links make it into page in the first place. That’s where some addition Grunt magic happens. Let’s take a look at our layout.ejs file.
Here is where the javascript links have been placed. Notice the two tags SCRIPTS and SCRIPTS END.
12
<!--SCRIPTS--><!--SCRIPTS END-->
This is where Grunt will place links to any javascript files placed in the /assets/linker/js folder. Grunt will also do this for our css between thse two tags, the STYLES and STYLES END:
12
<!--STYLES--><!--STYLES END-->
Now you may have noticed these socket.io.js, sails.io.js, and app.js files that are being injected into layout.ejs. Not surprisingly these files have to do with socket.io and sails, however, for the purposes of this screencast we can ignore those files.
But we still have this ordering problem with jquery. To fix this we can go back into the Grunfile.js and towards the top of this file is where Grunt is cofigured to inject css and javascript into layout.ejs. I’m going to put a path to jquery below some other javascript files but before this default “catch-all” link and I say catch-all link because as you can see with these astericks, grunt is going to look at the linker folder and any folder underneath the linker folder it’s going to look for any files with the .js ending. It’s going to take those files and place them in between these two tags.
12345678910111213141516171819202122
varjsFilesToInject=[// Below, as a demonstration, you'll see the built-in dependencies // linked in the proper order order// Bring in the socket.io client'linker/js/socket.io.js',// then beef it up with some convenience logic for talking to Sails.js'linker/js/sails.io.js',// A simpler boilerplate library for getting you up and running w/ an// automatic listener for incoming messages from Socket.io.'linker/js/app.js',// *-> put other dependencies here <-*'linker/js/jquery.js'// All of the rest of your app scripts imported here'linker/**/*.js'];
So now jquery will be loaded before any other javascript files located in the assets/linker/js folder. Let’s restart the sails server and go back to the browser and reload the page. Great now links to both our javascript and css files are being injected correctly. And just to make sure let’s go back to the source. And yes, we can see here that jquery is now being loaded before custom.js.
So to sum it up, having the linker folder provides for the automatic injection of links to any javascript or css files that are placed in the ‘assets/linker/js’ or ‘assets/linker/styles’ folders. Grunt based upon Gruntfile.js injects the links in layout.ejs.
Now let’s look at the project that doesn’t have a linker folder. When I start the sails server for this project using sails lift, the hidden .tmp folder is also created. The javascript and css files are copied into the public folder this time without the /linker folder. I’ll open up a browser and again go to localhost:1337.
This time, however, we don’t have the appended text from the custom.js file nor the red color to the text from the custom.css file. Why is that? If we look at the layout.ejs file, you’ll notice that the STYLE and SCRIPT tags are missing. These are automatically inserted when using the linker flag. Therefore, grunt doesn’t have these tags to tell it where to put the javascript and css file paths.
We can “upgrade” this project simply by adding the tags in layout.ejs. We also need to remove the paths that were initially added to layout.ejs when the project was created. Now let’s go into Gruntfile.js and insert the path to jquery like we did in the linker example. Finally we’ll need to move the css and javascript assets we currently have under a /linker folder. Now when I start sails and open a browser, the appended html is displayed in red, just as we expected. Looking at the page source, the css and javascript were injected properly and in the correct order into the page.
I hope you found this helpful and thanks as always for watching.
Howdy and welcome to another thought provoking, informative sailscasts answers. Okay, maybe that’s a bit of a stretch but welcome all the same. I’ve been asked a number of times how to implement a more attractive url system in sails…commonly using slugs.
Let’s take a look at an example. In activityOverlord when you’re on the user profile page, the url is something like this http://localhost:1337/user/show/5220fa7b8764043122000001. The ending part here is a mongoid. And that id is not very human friendly. What would be better is to have something like the person’s username. I’ll be doing a separate episode incorporating attrative urls into activityOverlord, however, in this screencast I’m going to show you how to do it generically for any project.
So I’ll create a new project called slugsville by entering sails new slugsville --linker with the linker flag. Next I’ll change into the slugsville folder and generate a user controller and model using sails generate user. So, let’s take a look at the user model. I’m going to paste in attributes for name, company, email, and phone as well as an attribute called slug.
Let’s switch to the user controller. I have a fairly generic create action that creates a user with params I’ll send through the Postman chrome extension and then we’ll return a json object. When the user is created, however, we need to put some logic in that will process the username removing any spaces and lower casing the string before saving the value into the slug model attribute. We’ll do this by adding a beforeCreate() method to our User model.
So going back to the User model, I’ll add the beforeCreate() method first chekcing whether name exists and then assigning the slug attribute the value of name with no spaces and all lowercase. Finally we’ll use the next() method to continue. Let’s see if that worked.
I’ll go into the terminal and start the sails server using sails lift. Next, we’ll go into the browser and using the postman chrome extension, I’ll create a new user with the following attributes. And great both the user and more importantly the slug were created.
So now let’s use this slug as a route parameter. I’ll head over into the `/config/routes.js file located in the config folder where we’ll create two routes.
12345678910111213
module.exports.routes={'get /:slug':'UserController.profile','get /user/:slug':'UserController.profile',// By default, your root route (aka home page) points to a view// located at `views/home/index.ejs`// // (This would also work if you had a file at: `/views/home.ejs`)'/':{view:'home/index'}};
Both /:slug and /user/:slug will bind themselves to the profile action of the User controller. In the User controller, I’ll create an action called profile. Next I’ll grab the slug param and assign it to the var slug. I want to let anything we catch with the slug param that has a dot in it like image.png to pass through without hitting our find method. That way we reduce the overhead of searching for a user for params we know are not a name. So if the param has a dot in it, we’ll return next() which will continue to the next piece of middleware (if any).
Next, we’ll try to find a user by the slug attribute passing in the slug variable we obtained form the param. If we don’t find a user, we’ll again return next(). If we do have a user I’m going to pass the entire user object to the view, in this case profile.ejs.
profile.ejs is a simple view template that displays the user name, company, email, and phone. Finally, I’m going to go back to the User controller and add a foo action to make sure that my action blueprint routes still work. If your not familiar with blueprint routes, I’m currently working on episode explaining blueprint routes, the first of which is devoted to action routes. Here I’m just adding the action foo that will return a 200 response.
Okay, let’s see if all of this worked? First, I’m going to create a few other users within postman. Here’s a list of our users. I can still access them via the id using /user/1. But now I can access them by their username either at /username or /user/username. I can also access my foo action.
I think that’s a much better approach. I’ve left a link to this project’s repo here if your interested and I hope that it was helpful and as always thanks for watching.
Howdy, I was recently asked whether there was a way to create dummy or fake data for testing in a sails project. One way to accomplish this is using /config/bootstrap.js. Although I can automate the creation of the users, I’ll still need some fake users for sails to create. Instead of manually typing in each user’s attributes, I found this really handy online tool called generatedate. You have a bunch of options of how you want your data generated. In this example I’ll select name, company, and email selecting the simple json format. I’ll copy all of these users and head over to the bootstrap.js file.
I’ll copy our new users into an array called dummyUsers. Next I’ll use the count() method on our user model. If there are any records in the User model than I’ll call the callback and nothing will be altered in the database. However, if there is no data in the model, I’ll use the create() method on the User model, passing in the array dummyUsers and then calling the callback. Note that the boostrap.js is run once each time sails is started via sails lift.
So, let’s see if that worked. I’ll go over to the terminal and enter sails lift. Next, I’ll get a list of user by entering /user into the browser. And there’s our hundred or so users.
I’ve posted a link to the github repo of this project and I hope this was helpful. Thanks as always for watching.
Howdy and welcome back. Like most of episodes this one is going to move quickly. I do this so they don’t go on forever, however, I highly recommend stopping and rewatching parts that might go to fast. So, I thought it would be useful to go over how to deploy activityOverlord into the wild. This episode will cover deployment to heroku, a self-described cloud application platform.
Heroku makes it really easy to deploy node apps without a lot of the overhead typically associated with deploymnet. Although this episode will concentrate on heroku, I plan on covering other platforms in future episodes.
First, let’s look at the current stack of technologies used by activityOverlord.
I’m running OS X Mountain Lion locally on a MacBook Pro. I’ve got node installed and sails of course runs on top of that. Our models, currently the user model, uses a mongodb database also running locally on mountain lion. And finally, we store our sessions and sockets in memory.
To do this deployment the stack of technologies is going to change.
For example, instead of running locally on OS X Mountain Lion, node and sails will run on an instance of the hardware and software provided by heroku. Looking at the heroku docs, node.js runs on instances of Ubuntu 10.04.
Next, instead of our current local mongodb database, we’ll create a new instance of the database on a hosted solution provided by mongohq. Finally, we’ll move our in memory socket and session store to redis and specifically redis-to-go hosted by heroku as well.
Moving from local mongodb to hosted mongohq
So you’ll first need to create an account on mongohq. Once you have an account and are logged in, create a new hosted mongodb instance using the sandbox option. Although this option isn’t for production it works for the purposes our project. Next, I created a user for the database that we’ll use to authenticate in our app.
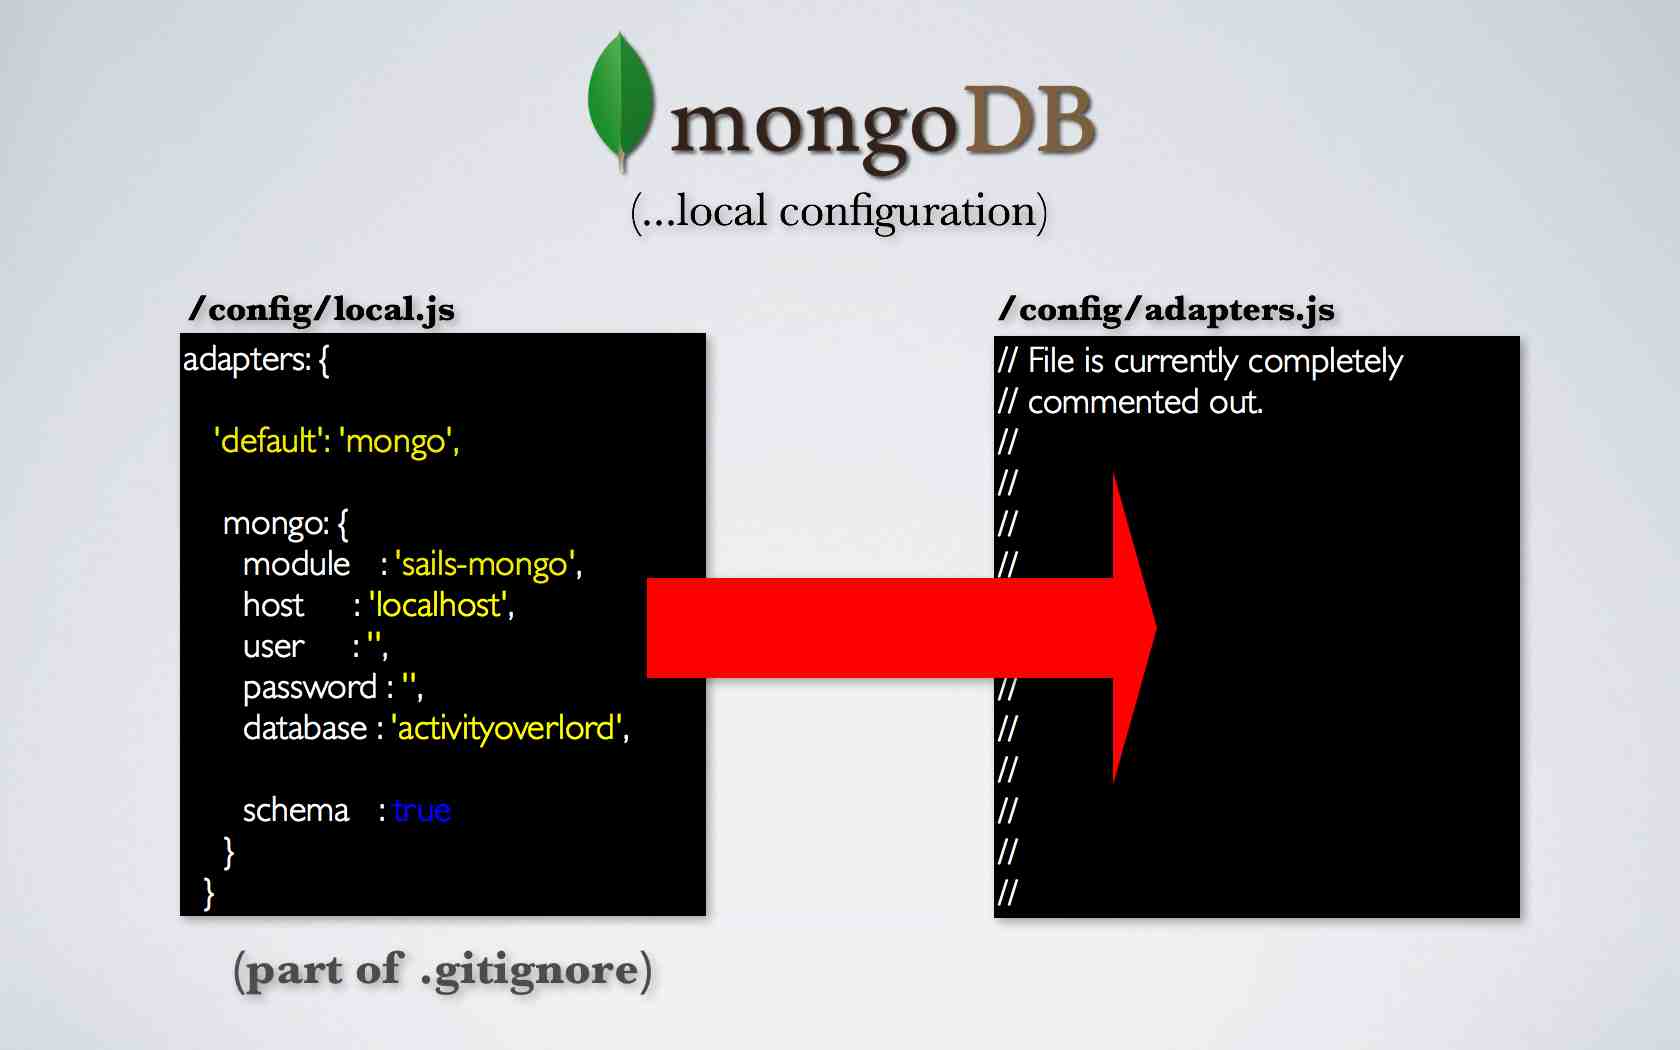
So I want to incorporate this hosted database in my local instance of activityOverlord before we move it to heroku and we do that by changing the local.js file. First let’s do a bit of review.
Our local configuration of mongoDB uses local.js within the config folder while adapters.js is completely commented out at the moment. The adapters.js file is one place sails looks to for connections to databases. The local.js file overrides anything contained in adapters.js. Also recall that local.js is part of .gitignore so the file will not be saved to git or our repo.
The impact of this is that anything sails relies upon in terms of configuration in local.js will not be part of the deployment unless we provide for it somewhere else in the code or by using environment variables prior to deployment.
Before we address the deployment issues lets first go into the code and make a few changes to local.js to use our new mongohq instance.
We no longer need the host, user, password, and database attributes because they are combined in a new attribute called url. I’ll copy and paste the url from the mongohq interface and then insert the username and password I created earlier for the database.
Let’s see if this worked. I’ll go into the terminal and lift activityoverlord. Next, I’ll create a new user and great it looks like things are working. So, I’ll go back into mongohq and into the user collection and there’s my new user. To start things off, I’ll change my admin attribute to true. Now, I’ll log-in to the account and…great I have my admin user set-up.
Okay, now, let’s deploy to heroku. If you don’t already have an account on heroku, go ahead and create one now. Next, you’ll want to install the heroku toolbelt which can be found here. Finally, you’ll want to login to heroku from the terminal. So let’s go to the terminal and type heroku login, this is going to ask us for our heroku credentials and the first time you run it, it’s also going to set-up your public SSH key. Don’t worry If you don’t already have one, heroku will walk you through setting one up.
So now that we have an account, got the toolbelt installed, and we’ve logged in from the terminal, we want to back to the heroku dashboard and select create a new app. If you want to enter in an app name it will need to be something other than activityoverlord as app names must be unique. If you don’t put in an app name, heroku will create one for you and regardless, you can always go back and rename your app later.
Now you’ll recall that we have a local.js file pointing to the mongodb database hosted on mongohq. Since local.js will not be part of our repo because of .gitignore we need some way of letting the heroku server instance know about the mongodb configuration and we do this with environment variables. So let’s go back into our adapters.js file and I’m going to copy and paste the mongodb configuration information from our local.js file into this adapters.js file. However, I’m going to replace where we have a string that contains the Username, password,path, and port of our mongodb instance on mongohq with an environment variable called DB_URL and that’s going to be prefaced by process.env.
So, process.env is a node object that contains our environment which also includes the environment variables that we’ll add to it. So to add the environment variable to our heroku instance, let’s go back to the terminal and we’ll type heroku config:set DB_URL= and to get our path I’ll look in our local.js and copy the path of our mongohq instance and paste it here, I’ll also add —app activitityoverlord1 to point specify which app to associate with.
So we’ve set DB_URL on the remote heroku instance using heroku config:set and used that environment variable in our adapters.js file to point to our mongoHQ instance.
So how is heroku going to start ativityoverlord? We do that by creating a Procfile in the root of our app. A Procfile is a mechanism for declaring what commands are run by our app’s dynos on the Heroku platform. More on dynos in a second. Let’s go back into the code and add a new file named Procfile with no extension. The file will have one line: web: node app.js
Next, make sure you have sails-mongo in your package.json file and that it’s installed in node_modules. In fact it’s probably best to do an npm install to make sure you have all of the depencies installed. Now we need to link up the heroku end point with our project. Let’s go back to the heroku dashboard and look under the settings tab. Go ahead and c opy the git url and then go back to the terminal and enter: git remote add heroku <and then paste the git url here> and press enter. Add all of your changes to git using: git add . and then commit them using git commit -am “my very descriptive change log”. Finally push the project by entering: git push heroku master.
The last step before we fire up our browser and look at activityOverlord is to set up a dyno for our app. Heroku suggests thinking of a dyno asa virtualized Unix container. In sum, it’s the place where our app will run. To assign one dyno to our app, type: heroku ps:scale web=1.
So let’s go back into the browser, refresh the app, and log-in. Everything looks to be working, however, open up the console and you’ll see an error. Socket.io is doing its job. Websockets isn’t working so its failing over to long polling so we still have a connection. As it turns out, heroku has just started to support web sockets and you must enable it on the application instance. To do that, we’ll go back to the console and type heroku labs:enable websockets. It can take a second before websockets starts working. There we go. Also, I have had issues with it periodically failing and going back to web polling, but it is in beta so we’ll see how it improves over the coming weeks.
Next, I want to take a look at moving our session and socket store to redis. But first, why would we want to do this in the first place? Let’s take the following example. I have three instances of heroku running activityOverlord on each instance. I use a load balancer to distribute the incoming requests across the three instances.
Suppose we store sessions in memory, and on the first request the load balancer sends us to instance A where we authenticate and the session cookie is set for that server instance. On the next request we’re sent to instance B, where we haven’t yet authenticated and therefore won’t be able to access the resources we would have had access on instance A. Therefore we need some way for the multiple instances of our application to share the same session store.
This is why we’re moving our session and socket store to redis.
So let’s set-up redis. We’ll head back to the heroku dashboard and our activityoverlord instance. Select add-ons and redis-to-go. Under Plans, select Nano, or the free plan. I had to put in a credit card despite picking the free option. Select add nano for free. Go back to you instance of activityoverlord and select redis-to-go nano under add-ons.
Here you’ll see the configuration path to our redis instance. First, let’s go into activityoverlord and our session.js file. As the documentation suggests, I’m going to uncomment, the adapter, host, port, db, and password keys. We can then go back to our redis-to-go configuration file and copy and paste each value into the keys in session.js.
/config/session.js
1234567
adapter:'redis',host:'soldierfish.redistogo.com',port:9599,// ttl: <redis session TTL in seconds>,db:'redistogo',pass:'d5d68502e87bf36e5d6d25d9c0f37b5a'
Okay, let’s see if this worked. I’ll go back into the terminal and commit my changes and then push them to our heroku instance. Now let’s go back to the browser and try to log in. Even though that worked the true test, is whether our session id is in the redis database. To determine this, I’m going to use the redis-cli command line tool. To use this tool we need to again use the host, port and password to authenticate to the database. Once connected I’ll use the keys command passing in an * as an argument to get all keys. And there’s our session key, great. The redis website has good documentation on other useful commands.
You might be asking yourself, I don’t really want to put my redis database credentials in my github repo, and you know you would be right, that would be a very bad idea! So instead we can use environment variables to set these credentials to our heroku instance. Let’s go back into session.js and change the values for the host, port, db, and pass keys to environment variables.
/config/session.js
1234567
adapter:'redis',host:process.env.REDIS_HOST,port:process.env.REDIS_PORT,// ttl: <redis session TTL in seconds>,db:process.env.REDIS_DB,pass:process.env.REDIS_PASS
Now the server instance will be looking for those environment variables for the values. We’ll set them on the heroku instance the same way we did for DB_URL using heroku config:set.
Okay, now let’s do the same for sockets. We’ll go back to sockets.js. Similar to session.js we’ll uncomment the host, port, db, and pass keys and then insert the environment variables for the values.
Now, I’m going to go back to the terminal and commit my changes again and push them to our heroku instance. Now I’ll go back to the browser, notice that I don’t have to login as my session is now maintained by redis whereas before we were doing things in memory which required us to login each time the server was lifted. I’ll manually log out and log back in. And great it looks like everything is working.
Okay, the last thing I want to address with deployment is changing the value of the NODE_ENV variable from development to production. For sails one of the biggest outwardly facing changes as a result of using production instead of development is that all of our css files will be combined and minified into one file. Javascript files will also be combined and minified as well. In addition many modules utilize NODE_ENV as a hook to determine whether to make changes based upon its value. We’re going to actually set the environment variable in our Procfile. So let’s go over to the Procfile and add web: NODE_ENV=production node app.js. I’ll commit my changes and push them to heroku. Back in the browser I’ll refresh the page and then look at the source to confirm that all of my css is minified in one file and all of my javascript is minified in one file.
So now that we’ve successfully deployed activityOverlord to Heroku I want to address the work-flow for moving forward with development. The repo for activityOverlord will have the following set-up for local.js, adapter.js, session.js, and sockets.js. The local.js file will default to our local instance of mongodb.
module.exports={port:process.env.PORT||1337,// The runtime "environment" of your Sails app is either 'development' or 'production'.//// In development, your Sails app will go out of its way to help you// (for instance you will receive more descriptive error and debugging output)//// In production, Sails configures itself (and its dependencies) to optimize performance.// You should always put your app in production mode before you deploy it to a server-// This helps ensure that your Sails app remains stable, performant, and scalable.// // By default, Sails sets its environment using the `NODE_ENV` environment variable.// If NODE_ENV is not set, Sails will run in the 'development' environment.environment:process.env.NODE_ENV||'development',// LOCAL MONGO DBadapters:{'default':'mongo',mongo:{module:'sails-mongo',host:'localhost',user:'',password:'',database:'activityoverlord',schema:true}}// // // HOSTED MONGO HQ// adapters: {// 'default': 'mongo',// mongo: {// module : 'sails-mongo',// url: "mongodb://admin:1234@paulo.mongohq.com:10099/activityoverlord",// schema: true// }// }};
If you want the local version of activityOverlord to use hosted mongohq instance, just uncomment and comment the following lines. Since local.js will overwrite adapters.js we can leave the existing code in it.
module.exports.session={// Session secret is automatically generated when your new app is created// Replace at your own risk in production-- you will invalidate the cookies of your users,// forcing them to log in again. secret:'d494d185735d00432bc3485d32bd5ca8',// In production, uncomment the following lines to set up a shared redis session store// that can be shared across multiple Sails.js servers// HOSTED REDIS INSTANCEadapter:'redis',host:process.env.REDIS_HOST,port:process.env.REDIS_PORT,// ttl: <redis session TTL in seconds>,db:process.env.REDIS_DB,pass:process.env.REDIS_PASS// prefix: 'sess:'// // USE IN MEMORY// adapter: 'memory'// Uncomment the following lines to use your Mongo adapter as a session store// adapter: 'mongo',//// host: 'localhost',// port: 27017,// db: 'sails',// collection: 'sessions',//// Optional Values://// # Note: url will override other connection settings// url: 'mongodb://user:pass@host:port/database/collection',//// username: '',// password: '',// auto_reconnect: false,// ssl: false,// stringify: true};
The same holds true for the Sockets.js configuration file.
/** * Socket Configuration * * These configuration options provide transparent access to Sails' encapsulated * pubsub/socket server for complete customizability. * * For more information on using Sails with Sockets, check out: * http://sailsjs.org/#documentation */module.exports.sockets={// `transports`//// A array of allowed transport methods which the clients will try to use.// The flashsocket transport is disabled by default// You can enable flashsockets by adding 'flashsocket' to this list:transports:['websocket','htmlfile','xhr-polling','jsonp-polling'],// Use this option to set the datastore socket.io will use to manage rooms/sockets/subscriptions:// default: memory// HOSTED REDIS INSTANCEadapter:'redis',host:process.env.REDIS_HOST,port:process.env.REDIS_PORT,db:process.env.REDIS_DB,pass:process.env.REDIS_PASS,// IN MEMORY// adapter: 'memory',// Worth mentioning is that, if `adapter` config is `redis`, // but host/port is left unset, Sails will try to connect to redis // running on localhost via port 6379 // `authorization`//// Global authorization for Socket.IO access, // this is called when the initial handshake is performed with the server.// // By default (`authorization: true`), when a socket tries to connect, Sails verifies// that a valid cookie was sent with the upgrade request. If the cookie doesn't match// any known user session, a new user session is created for it.//// However, in the case of cross-domain requests, it is possible to receive a connection// upgrade request WITHOUT A COOKIE (for certain transports)// In this case, there is no way to keep track of the requesting user between requests,// since there is no identifying information to link him/her with a session.//// If you don't care about keeping track of your socket users between requests,// you can bypass this cookie check by setting `authorization: false`// which will disable the session for socket requests (req.session is still accessible // in each request, but it will be empty, and any changes to it will not be persisted)//// On the other hand, if you DO need to keep track of user sessions, // you can pass along a ?cookie query parameter to the upgrade url, // which Sails will use in the absense of a proper cookie// e.g. (when connection from the client):// io.connect('http://localhost:1337?cookie=smokeybear')//// (Un)fortunately, the user's cookie is (should!) not accessible in client-side js.// Using HTTP-only cookies is crucial for your app's security.// Primarily because of this situation, as well as a handful of other advanced// use cases, Sails allows you to override the authorization behavior // with your own custom logic by specifying a function, e.g:/* authorization: function authorizeAttemptedSocketConnection(reqObj, cb) { // Any data saved in `handshake` is available in subsequent requests // from this as `req.socket.handshake.*` // // to allow the connection, call `cb(null, true)` // to prevent the connection, call `cb(null, false)` // to report an error, call `cb(err)` } */authorization:true,// Match string representing the origins that are allowed to connect to the Socket.IO serverorigins:'*:*',// Should we use heartbeats to check the health of Socket.IO connections?heartbeats:true,// When client closes connection, the # of seconds to wait before attempting a reconnect.// This value is sent to the client after a successful handshake.'close timeout':60,// The # of seconds between heartbeats sent from the client to the server// This value is sent to the client after a successful handshake.'heartbeat timeout':60,// The max # of seconds to wait for an expcted heartbeat before declaring the pipe broken// This number should be less than the `heartbeat timeout`'heartbeat interval':25,// The maximum duration of one HTTP poll-// if it exceeds this limit it will be closed.'polling duration':20,// Enable the flash policy server if the flashsocket transport is enabled// 'flash policy server': true,// By default the Socket.IO client will check port 10843 on your server // to see if flashsocket connections are allowed.// The Adobe Flash Player normally uses 843 as default port, // but Socket.io defaults to a non root port (10843) by default//// If you are using a hosting provider that doesn't allow you to start servers// other than on port 80 or the provided port, and you still want to support flashsockets // you can set the `flash policy port` to -1'flash policy port':10843,// Used by the HTTP transports. The Socket.IO server buffers HTTP request bodies up to this limit. // This limit is not applied to websocket or flashsockets.'destroy buffer size':'10E7',// Do we need to destroy non-socket.io upgrade requests?'destroy upgrade':true,// Should Sails/Socket.io serve the `socket.io.js` client? // (as well as WebSocketMain.swf for Flash sockets, etc.)'browser client':true,// Cache the Socket.IO file generation in the memory of the process// to speed up the serving of the static files.'browser client cache':true,// Does Socket.IO need to send a minified build of the static client script?'browser client minification':false,// Does Socket.IO need to send an ETag header for the static requests?'browser client etag':false,// Adds a Cache-Control: private, x-gzip-ok="", max-age=31536000 header to static requests, // but only if the file is requested with a version number like /socket.io/socket.io.v0.9.9.js.'browser client expires':315360000,// Does Socket.IO need to GZIP the static files?// This process is only done once and the computed output is stored in memory. // So we don't have to spawn a gzip process for each request.'browser client gzip':false,// Optional override function to serve all static files, // including socket.io.js et al.// Of the form :: function (req, res) { /* serve files */ }'browser client handler':false,// Meant to be used when running socket.io behind a proxy. // Should be set to true when you want the location handshake to match the protocol of the origin. // This fixes issues with terminating the SSL in front of Node // and forcing location to think it's wss instead of ws.'match origin protocol':false,// Direct access to the socket.io MQ store config// The 'adapter' property is the preferred method// (`undefined` indicates that Sails should defer to the 'adapter' config)store:undefined,// A logger instance that is used to output log information.// (`undefined` indicates deferment to the main Sails log config)logger:undefined,// The amount of detail that the server should output to the logger.// (`undefined` indicates deferment to the main Sails log config)'log level':undefined,// Whether to color the log type when output to the logger.// (`undefined` indicates deferment to the main Sails log config)'log colors':undefined,// A Static instance that is used to serve the socket.io client and its dependencies.// (`undefined` indicates use default)'static':undefined,// The entry point where Socket.IO starts looking for incoming connections. // This should be the same between the client and the server.resource:'/socket.io'};
We’ve covered a bunch of material in this episode. I hope you found it helpful and as always thanks for watching.
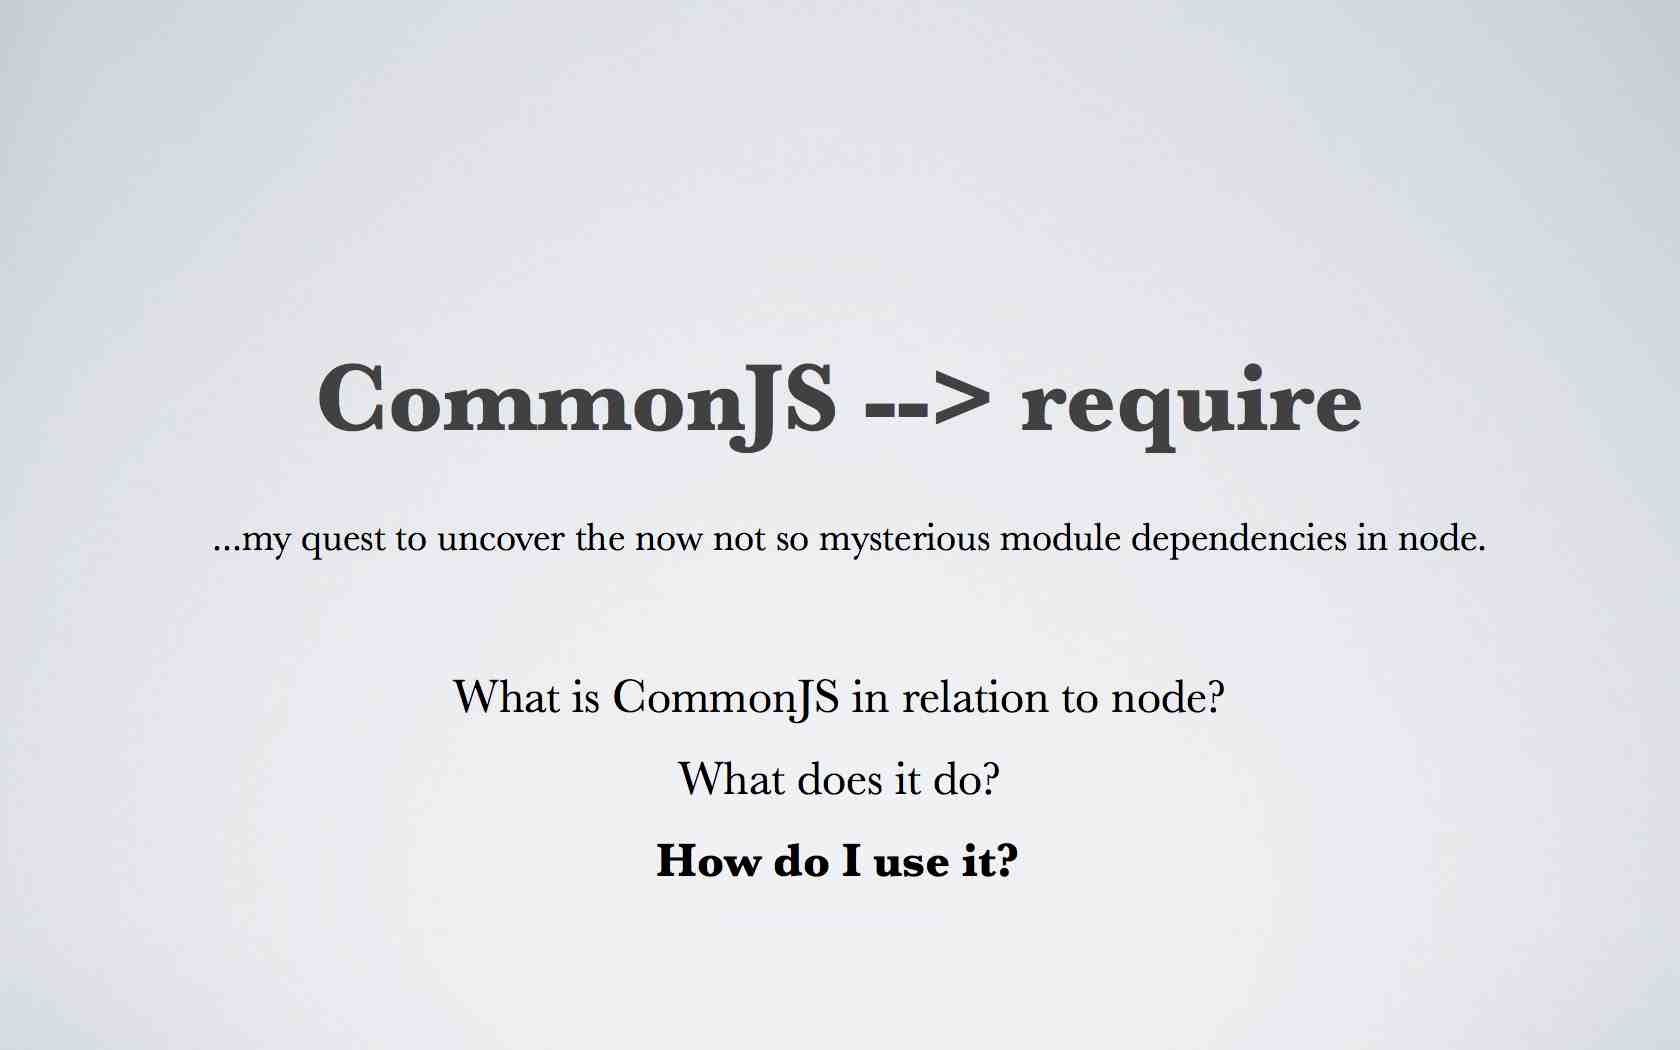
Howdy. Today I’m here to talk about my quest to understand the mysterious world of node module dependencies. The good news is, in the end, it’s really not very mysterious. Hopefully, by the end of this screencast I’ll have answered:
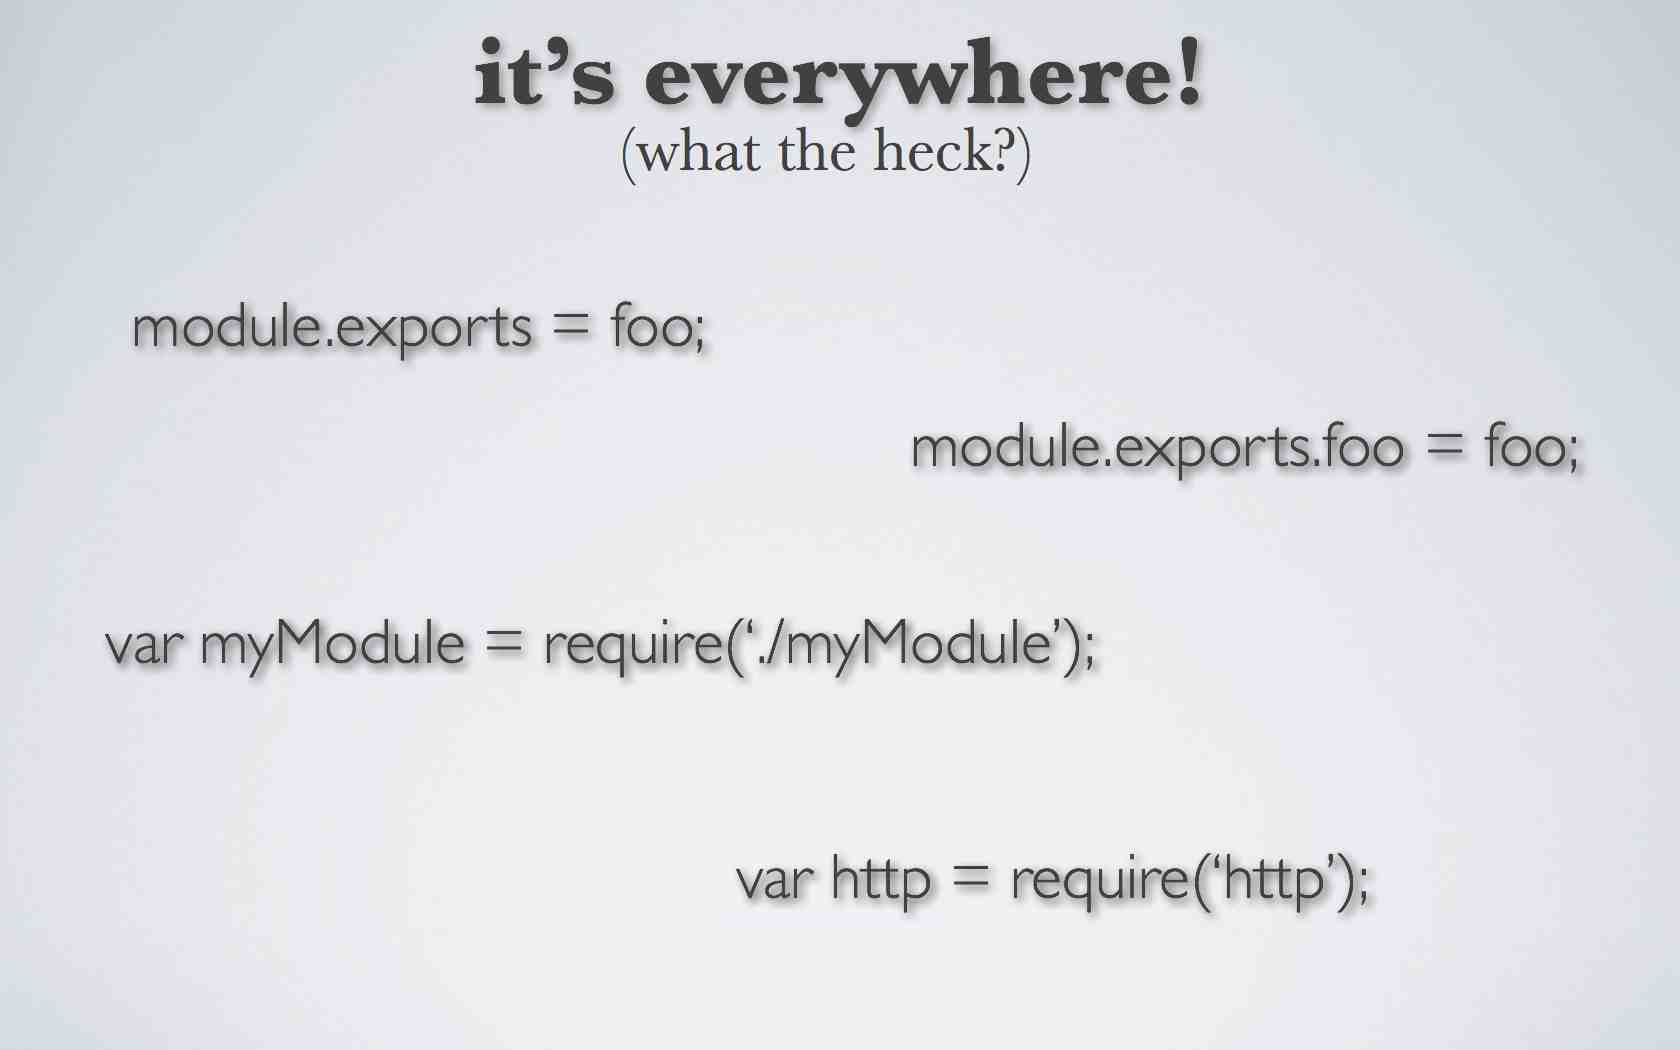
Although I’ll be talking about CommonJS mainly from a node perspective this is completely relevant to sails in that you’ll be using the module pattern in your sails development. If you’ve ever looked at the source of a node application you’ve come across some derivation of the following methods and objects.
Node applications are made up of modules, which are the equivalent of source text files. Actually that’s not completely accurate, a module can also be a compiled node module file, but I’m getting ahead of myself. Each module or text source file is its own domain and the objects, methods, variables, and classes contained in them are oblivious to other objects, methods, variables, and classes contained in other modules. They are in effect private to the module file that contains them. How do we make different module files aware of each other? That’s where the module pattern comes in and specifically node’s use of CommonJS.
The CommonJS implementation of the module pattern also protects the scope of your code to a particular module instead of opening up everything to a global scope. Therefore, only the modules that are connected in a way which I’m about to describe are aware of each other.
First a quick note on what CommonJS isn’t. At first I got confused between RequireJS and CommonJS. Although CommonJS does use a method named require, CommonJS and RequireJS are not the same thing.
My understanding is that RequireJS was created out of a need for a module loader within the browser as opposed to node which is running on the server. Anyway, don’t make the same mistake I did and start reading the RequireJS documentation thinking it’s the same thing as what’s used in node..
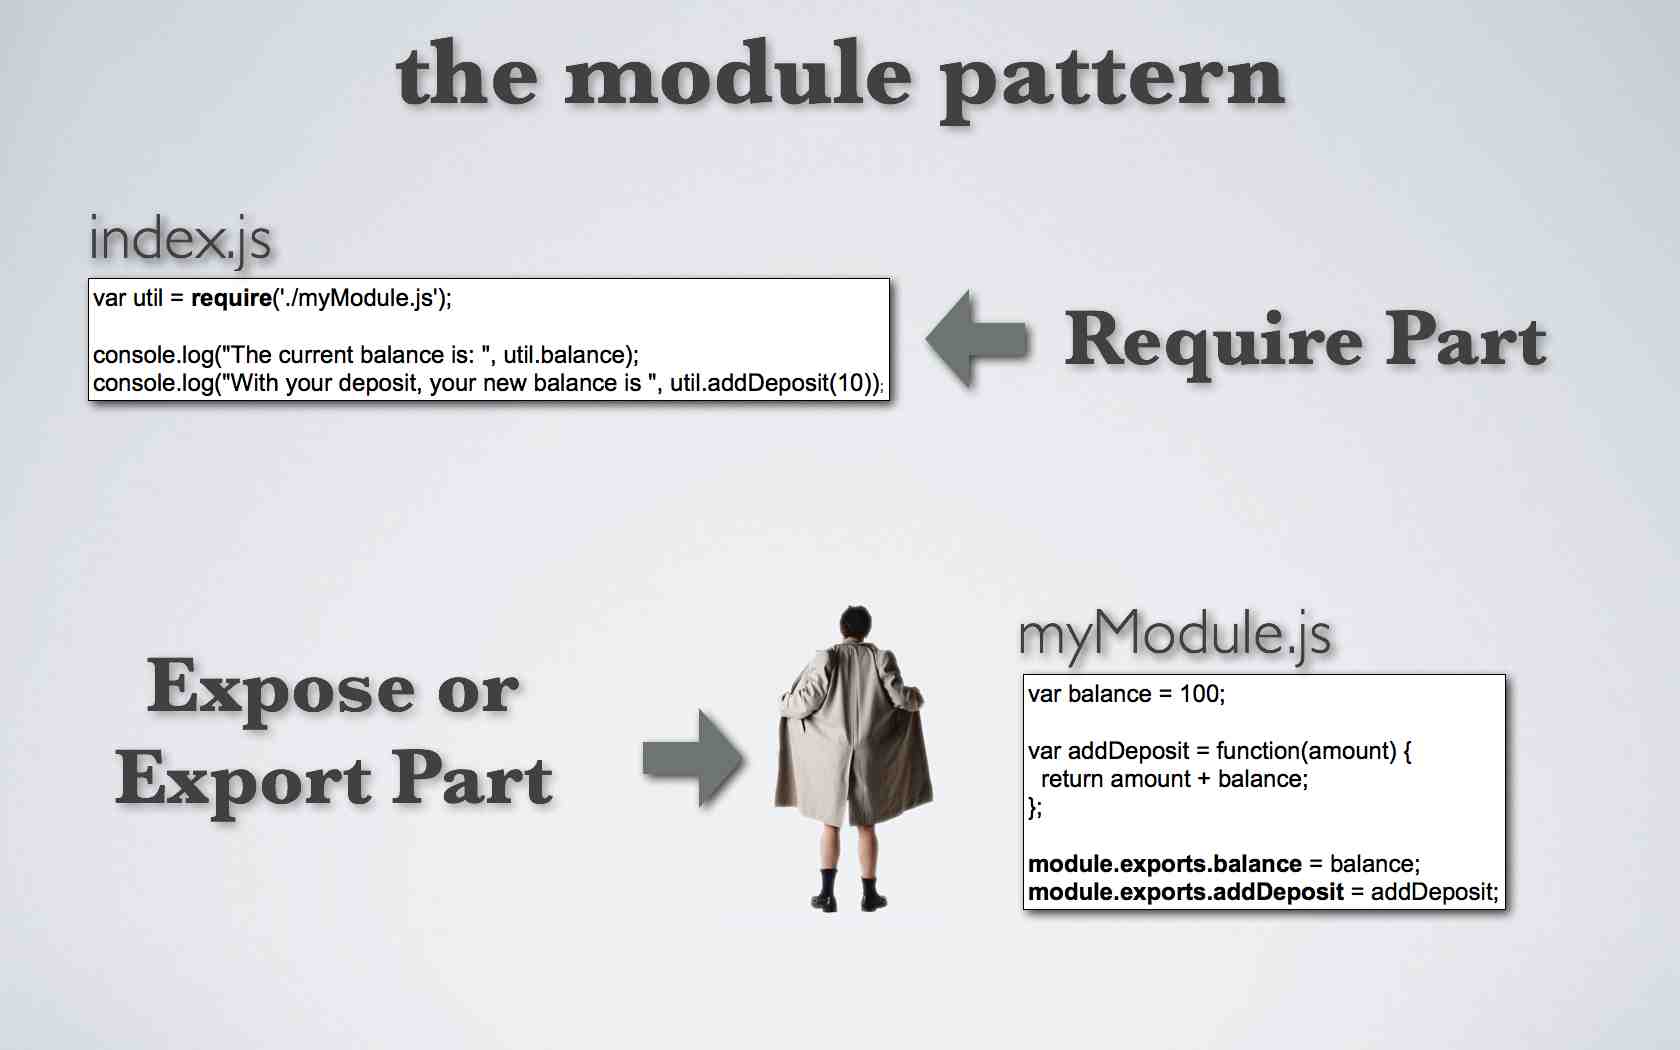
Now on to the module pattern. This pattern consists of two basic steps. One of the steps involves “requiring” a module you want to include from one file while from the other file or module “exposing” the stuff that you want to make available to other modules.
I’m going to talk about the “require” part of pattern first. I think the best way to learn this stuff is through examples. One of the early examples we’re exposed to in learning node is creating a server using the http module. For example:
I want to focus on the first line: var http= require(‘http’); This line creates a reference or variable to the module http. This happens to be one of the modules that comes compiled with node. Armed with our http variable we can now access everything that was exposed in that module via dot notation. For example, that’s how access the createServer method.
However, let’s say we want to create our own module, how would we require it? I’m going to explore several ways of requiring a module but one initial way is to use:
var utility = require('./myModule.js');
So let’s create a new file called index.js.
index.js
1
varutility=require('./myModule.js');
…and I’ll paste our new require line into the file. Breaking this down we have an arbitrary var named utility referencing a javascript file myModule.JS located in the same directory or relative path as index.js. So before we starting using our new module, we need to create it. So, next I’m going to create another file called myModule.js in the same directory with the following code.
In this file I added a var called balance and initialized it with a value of 100. Next I created a function addDeposit. The last two lines are the important part. I exposed the var balance by exporting it via module.exports. I could have named the attribute something other than balance but by convention I’m going to use the same name as the actual var. I did the same thing to expose the addDeposit function, that is using module.exports.
Now let’s go back to our index.js file and we’ll use our newly created module.
index.js
1234
varutility=require('./myModule.js');console.log("The current balance is: ",utility.balance);console.log("With your deposit, your new balance is ",utility.addDeposit(10)+”.”);
I can access the exported var and function from myModule through dot notation and my reference named utility. In this case utility.balance for the balance and utility.addDeposit(10) for the function. Again the use of the name utiityl is completely arbitrary, I could have named this reference foo. So let’s see this in action.
I’ll go to the terminal and type node index.js to launch our module. And as we wanted the module returned the balance before and after the deposit.
Next, I’m going to expand this module to act like a class using a function as a constructor. Notice that in addition to the instance attributes and methods I also have class variables and methods (e.g. class_variable and class_method) that are not exposed via require.
myModule1.js
123456789101112131415161718192021
varaccount=function(balance){varclass_variable="Classy";varclass_method=function(){/* Todo * Debit account a few cents each day and put it * Lumbergh's account */console.log("Nothing to see here.");}this.balance=balance;this.addDeposit=function(deposit){returnthis.balance+=deposit;}returnthis;}module.exports=account;
Keeping with the pattern after you expose or export the code you want to make available from your module, we’ll do the other step of the pattern by requiring the module. I’m creating a new file index1.js.
index1.js
1234567
varAccount=require('./myModule1.js');varaccount=newAccount(200);account.deposit=25;console.log("The current balance is: ",account.balance);console.log("With your deposit of "+account.deposit+" your new balance is "+account.addDeposit(account.deposit));
Here I’m instantiating the Account class reference using the var account while passing in a new balance for the account as an argument. The other change is adding a deposit attribute to the account instance. Now, let’s see this in action.
I’ll go back to the terminal and type node index1.js to launch our module. And as we wanted the module returned the balance before and after the deposit as well as the amount of the deposit itself.
Next I want to show an example of the pattern where we can instantiate the Account class from within the require statement itself.
First, we’ll create a new module named myModule2.js.
On line one I declare the var Account and do the export of the function in the same line of code. I capitalized the A in Account to signify that it represents a class, however, this isn’t necessary to making any of this work and is strictly a convention. I then build up an object that will eventually be returned when Account is instantiated. Now let’s create index2.js:
index2.js
1234567
varaccount=require('./myModule2.js')(2000);account.addDeposit(10));account.deposit=25;console.log("The current balance is: ",account.balance);console.log("With your deposit of "+account.deposit+" your new balance is "+account.addDeposit(account.deposit)+“.”);
Notice in line one where we’re doing our usual require, in this case by putting the arguments on the end of the statement we’re actually creating a new instance of the Account class assigning it to account while passing the argument with a value of 2000. Let’s see how this works.
The results this time reflect passing the initial balance in as an argument and we have access to our instance variables and method as expected.
The last example is where we export an object directly and I’m going to use our model in activityOverlord found in api/models/User.js. Notice that we’re wrapping the entire file with module.exports.
/** * User * * @module :: Model * @description :: A short summary of how this model works and what it represents. * */module.exports={schema:true,attributes:{name:{type:'string',required:true},title:{type:'string'},email:{type:'string',email:true,required:true,unique:true},encryptedPassword:{type:'string'},online:{type:'boolean',defaultsTo:false},admin:{type:'boolean',defaultsTo:false},toJSON:function(){varobj=this.toObject();deleteobj.password;deleteobj.confirmation;deleteobj.encryptedPassword;deleteobj._csrf;returnobj;}},beforeValidation:function(values,next){if(typeofvalues.admin!=='undefined'){if(values.admin==='unchecked'){values.admin=false;}elseif(values.admin[1]==='on'){values.admin=true;}}next();},beforeCreate:function(values,next){// This checks to make sure the password and password confirmation match before creating recordif(!values.password||values.password!=values.confirmation){returnnext({err:["Password doesn't match password confirmation."]});}require('bcrypt').hash(values.password,10,functionpasswordEncrypted(err,encryptedPassword){if(err)returnnext(err);values.encryptedPassword=encryptedPassword;// values.online= true;next();});}};
Next, we’ll require this module and take a look at a couple of its attributes.
Let’s see it in action. As expected we get back the attributes we requested via dot notation.
So where can I put modules?
Okay so the last thing I want to cover is a more extensive look at where we can put modules and how to require them in these different locations. As I mentioned at the beginning of the screencast there’s a distinction between node’s core modules and our own custom file modules we’ve been working with. Core modules like http can be referenced by using just the module name (e.g. ‘http’). For file modules we have a bunch of options.
So far, we’ve been accessing our modules via relative paths. But we could also use an absolute path like:
var myModule = require(‘/home/api/foo.js’);
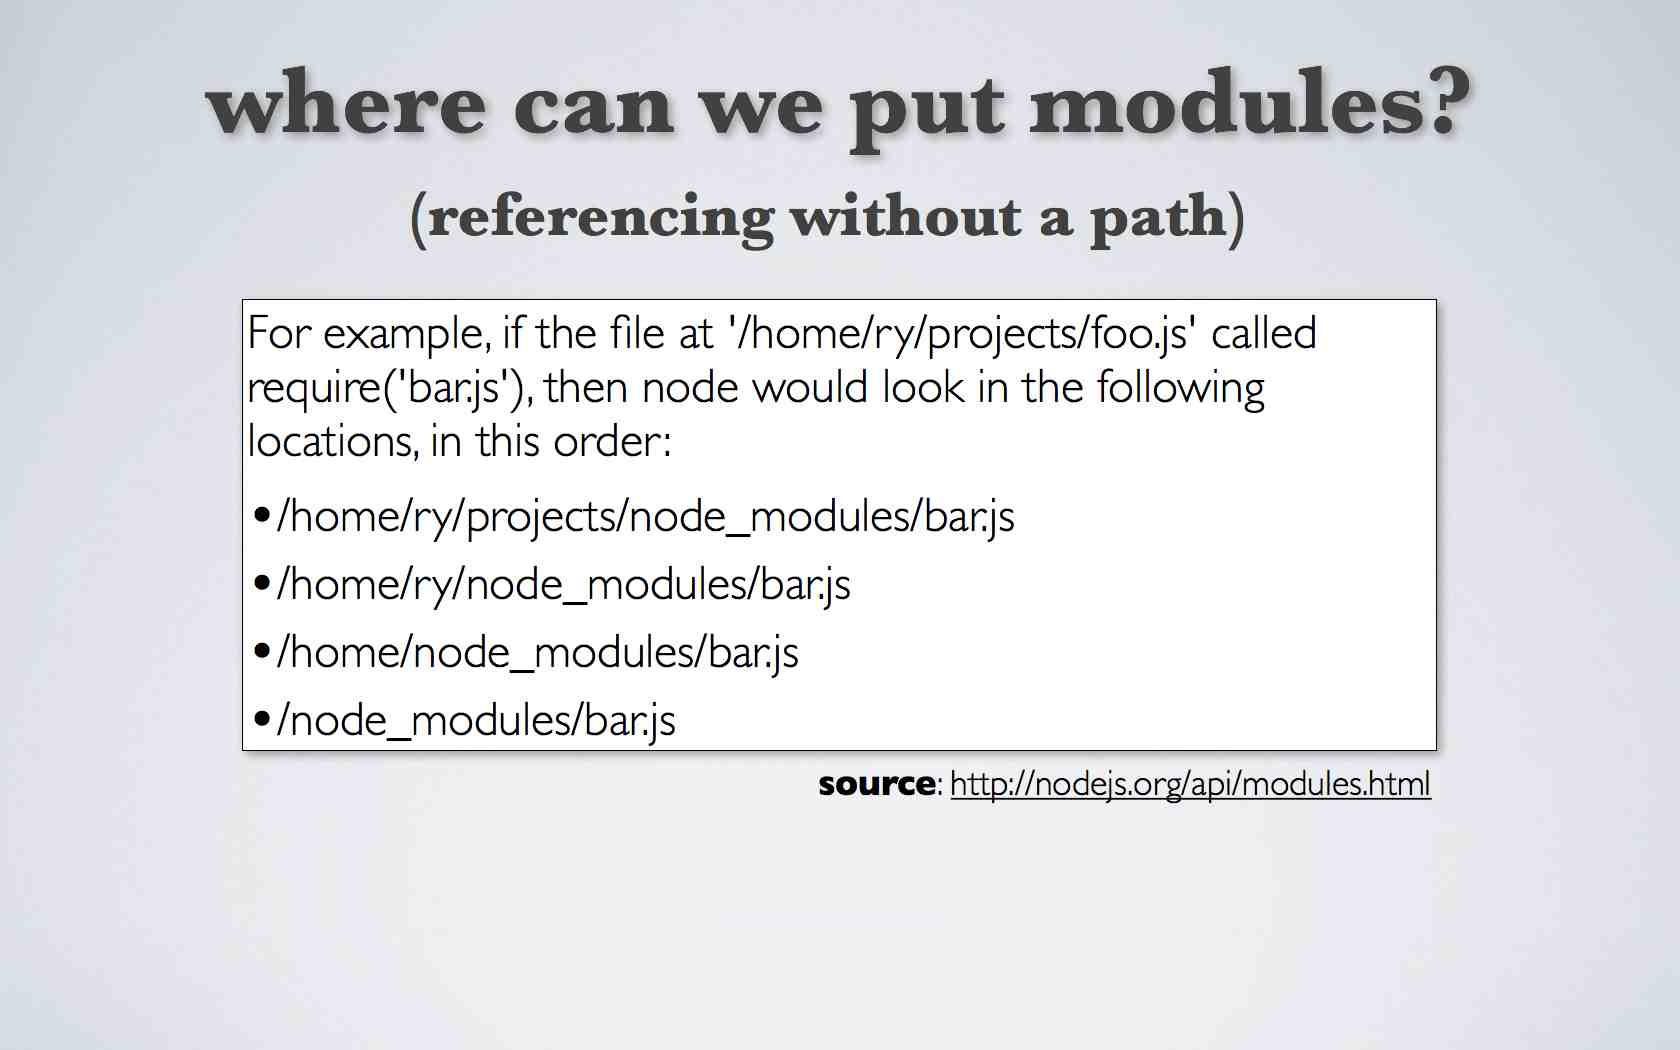
You can also require a file module without using ‘/’, ‘./’ or ‘../’ however, the module must be placed in a node_modules folder. The node documentation has a good example I’ve included here.
So node will first look in the same directory where the file that it’s calling is located, in this example /home/ry/projects/node_modules. If it doesn’t find it there it will traverse up the file system path until it either finds the node_modules folder and module or gets to the root of the path without finding it in which case returning a ‘module not found’ error.
Folders as Modules
The final area I want to look at is using Folders as Modules. This happens when you want to provide a package or library that is organized using a directory structure with one entry point to the package or library. For example, let’s say you have a new templating library superTemp and all of its supporting modules will be installed at the root of /superTemp.
You could require the library by using:
var superTemp = require(‘./superTemp’);
So what are my options for the entry point or the initial javascript file? If I create a file index.js and put it in ‘./superTemp’, node will run that file first. I could also use the extension index.node. Finally, if I wanted to use a different name than index you can create a package.json file using the following syntax:
So let’s see how that works. I’ve set-up an admittedly contrived directory structure under this example 1 folder. So we have a module index.js that requires another module, myModule.js in the otherDir folder. Notice that the parenthesis at the end of the statement which means we’ll be instantiating the function. myModule.js is a just a function that logs “Our app is launched!”. Finally, we have a file launcher.js that requires the folder /super_temp. So now I’ll go to the terminal and type node launcher and we get our log message that our app has launched.
Now let’s go into the example two folder. Again a contrived directory structure but here instead of an index.js file we have a package.json file. The package.json file points to myCrazyNamingConventionDealWithIt.js module. And like our other example that module points to myModule in the otherDir folder. Let’s see what happens. And again we get the expected results.
Okay gang, I know that was a bunch of stuff. I hope it was helpful and thanks for watching as always.